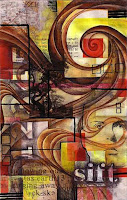
Friday, November 20, 2009

NCCAT and NBPTS

Dave and I successfully rocked another season of NCCAT (North Carolina Center for the Advancement of Teaching). It was an awesome week with 20 teachers from all over the state of North Carolina. Some were already familiar with the visual journal, and some were not. All participants gelled very quickly with each other and with the journal.

A real highlight of the week was the chance to meet author Patti Digh. A year ago, Dave and I were introduced to her book Life is a Verb, and we had the chance to hear her read passages from her book. The premise of the book is simple: If you had 37 days to live, how would you be living those 37 days, and why are you not living that way now? Life is a Verb is full of stories, advice, and activities to lead a richer life. We were honored to have her stop by our seminar room and check out what we were doing. She even included us on her blog. Thanks for the shout out. I highly recommend Patti's book if you are looking to live a higher quality life.

Part of the art bomb that was dropped during the week.

A journal spread by Amy, a.k.a. A-Shon.

A sparkling spider web on a bronze statue outside of NCCAT on the last day.


The week ended on an even higher note, I found out today, that I passed my National Boards.

Wednesday, November 11, 2009

Pages and NCCAT

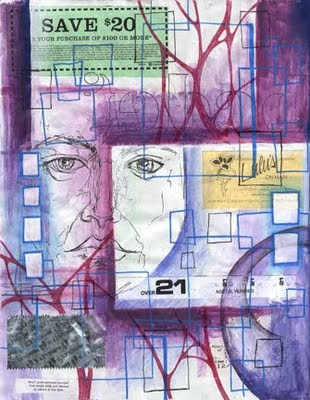
I wanted to share a few more pages from journal #11. The above two-page spread uses watercolor pencil, ink, collage, solvent transfer, and acrylic paint. The page below contains a rectangular window in the center that shows the previous page. The rest of the page is simply black ink using one of my favorite pens - the uniball Vision. Sometimes it is simply fun to use a single medium on a page.


Dave and I are gearing up to teach at the North Carolina Center for the Advancement of Teaching (NCCAT). It has to be one of our favorite places as we spend a week teaching 24 participants about the visual journal. It is always a lot of work, but very rewarding. Amazing things happen there. We are grateful to the center for having us back for the fifth time and to those who keep signing up to attend.

Monday, November 2, 2009

Natural Conflict


This is a new piece that I created over the last week. I first cut a piece of Aquarelle Multimedia paper to 11"x14" - the same size as one of my journal pages. Then I began layering various colors and shapes using Prismacolor watercolor pencil. I allowed the paper to dry in between layers, and after the last layer of watercolor pencil, I began developing the image further with regular Prismacolor pencil. The image above shows the piece in process after all the watercolor pencil had been applied, and just as I began using colored pencil. The image below shows the completed piece. This piece is part of my excavation series, and I wanted to experiment with a new idea by combining the organic froms with the geometric.

Tuesday, October 27, 2009

JFJ at the NCAEA

This past weekend, Dave an I traveled to Winston-Salem, NC for the NCAEA annual professional conference where we reconnected with many old friends and met a few new ones. The conferences are always so invigorating, and they always remind me of the powerful thing that the visual journal truly is. I am continually awed by the passion, the support, and the excitement that the journal elicits from so many out there. We were very honored to even have the Executive Director of the National Art Education Association, Deborah Reeve sit in on two of our presentations. I think it speaks to the power of connecting with others.

Dave and I will keep advocating for the place of the visual journal as a personal, educational, and professional tool, for we feel that the journal is a revolutionary and life-changing form. We are grateful to all those who came out to one of our presentations or workshops, who shared their stories, and who supported us in anyway over the weekend. As long as we see the need, we will continue to put ourselves and our journals out there.

Next up for the Journal Fodder Junkies is a trip to Cullowhee, NC to the North Carolina Center for the Advancement of Teaching (NCCAT) in order to teach our fifth seminar. Seems like yesterday that I was blogging about our last trip there, but it's been over 9 months. We are looking forward to another great group.

And just so everyone knows, Dave and I are available to come to schools, studios, and art centers to present workshops on the visual journal. Contact us to see if we can work out details.

Thanks again to everyone and their support.

Monday, October 19, 2009

JFJ in the News

The above photo shows pages of student visual journals. The photo is by Dennis Grundman of The Northern Virginia Daily.

I was recently interviewed for an article in one of the local papers here in Northern Virginia - The Northern Virginia Daily. The article talks about students using visual journals at James Wood High School in Winchester, VA. Dave and I have done a couple of workshops there over the last few years - one for teachers and one for students. A big thank you goes out to Stephanie Woshner and Vikki Pitcock for organizing those workshops and encouraging their students.

Click here to read the story.

Saturday, October 17, 2009

I Am...


School is in full swing now, and I am finding it difficult to eek out a little time to scan and update the blog, the Flickr site, and the Facebook page. But I was able to scan a few pages from Journal #11 yesterday, so I have somethings to share. The above page is the first page in the journal that I retired last year (I am currently in volume 12). As is my tradition, I started this journal with an "I am..." page. This page was started with an activity that Dave likes to use when teaching students, teachers, and workshop participants about combining words and images. He titled it the Challenge of Beauty, and it is an adaptation of Angeles Arrien's preferential shapes test from her book Signs of Life: The Five Universal Shapes and How to Use Them. I like using this "I am..." concept as an introduction to a new journal.

In other news, Dave and I will be at the NCAEA Professional Development Conference in Winston-Salem, NC next week, and we hope to see some of you there.

Saturday, September 26, 2009

Starting a Revolution

Starting a revolution is a lot of work and takes up a lot of time. Dave and I have been busy reviewing and editing the manuscript trying to get it ready for publication. Also school has started for both of us, Dave at Appalachian State University in Boone, NC and me at Stone Bridge High School, In Ashburn, VA. But we are both committed to this visual journal revolution knowing how valuable a tool it is for life.

A couple events are coming up for us in the next couple of months. We will be presenting various presentations and workshops at the North Carolina Art Education Association (NCAEA) Professional Development Conference coming up in October, and we will be leading our fifth Renewal Seminar coming up at the North Carolina Center for the Advancement of Teaching (NCCAT) in November. Incidentally, the above journal page was created at a past NCAEA Conference.

Busy. Busy. Busy.

Sunday, September 6, 2009

Working...

This is a drawing that I made a few years ago, and just wanted to post something new. It is interesting to compare this to the Excavation Painting.

In other news, Dave and I are working on a review copy of the book making changes and clarifying words, phrases, and passages. Our editor reviewed the text, brought up suggestions, questions, and areas of concern. It's always good to have fresh eyes look at your writing because what sounds good to you - the one who knows the subject inside and out - might be completely perplexing to someone just coming to the subject. So, the process is moving along, and it looks like the book will be out next May. It was quite a surprise to find our book listed on Amazon.com already. So you can pre-order the book there. There's no image of the cover yet, but that will be released closer to the publishing date. Click here to go to Amazon.

Tuesday, August 25, 2009

Monday, August 17, 2009

Journal Page

Page 2 in my current journal. It's been done for a while, but I haven't gotten around to posting it. There's no real theme or underlying concept. It's an accumulation of marks, media, fodder, and memories.

The Journal Fodder Junkies are now on Facebook. I'll be posting more updates there - such as upcoming events. Fans will be able to post images as well as messages. So, stop by and become a fan if you're on Facebook. If you're not, what are you waiting for. There's not a lot yet, but I just set it up over the weekend. Click the link to the right.

Thursday, August 13, 2009

Excavation

This painting is taking shape as I have been able to develop more areas of it over the last week. I am really liking the sense of space that is beginning to develop, but it still has a long way to go.

Tuesday, August 11, 2009

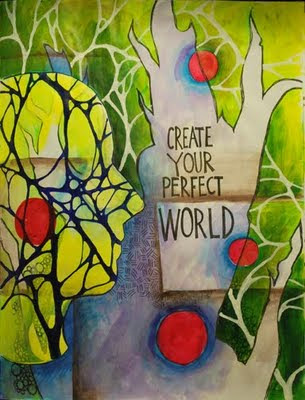
Create Your Perfect World

I feel that this page from my current journal is pretty complete. You may recognize it from an earlier post, but it has undergone a big transformation. This page began as inspiration from one of Steve's splotch monsters. I added a lot of watercolor pencil, pen, and ultimately acrylic paint. The paint makes if feel much tighter and more formal than many of my other pages. It's nice to mix it up. The quote "Create Your Perfect World" came from somewhere, but I can't remember. I guess I should acknowledge my sources.

Thursday, August 6, 2009

Life Gets Busy

It is the same old story. Life gets busy and things fall by the wayside. With the end of the school year, teaching a summer program, finishing up the manuscript, and helping Dave move, I have not had much time lately. But I have started a relief painting, and wanted to share the beginnings of it. The idea grew out of the journal and could easily be adapted back into the journal.

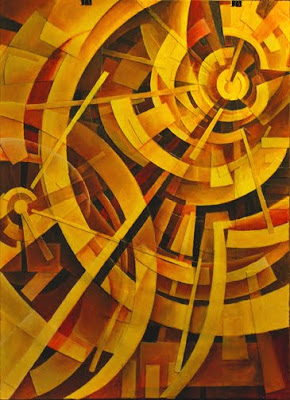
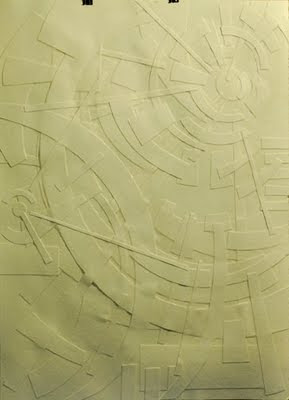
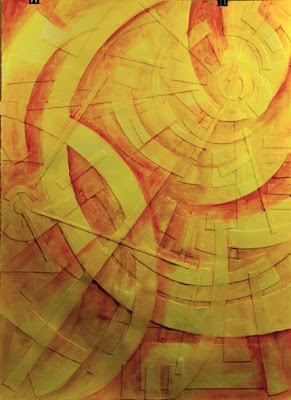
Much of my work lately has been dealing with the layering of certain shapes and the sense of depth, overlapping, and transparencies. So I wanted to push this idea even further. By working with 22 in x 30 in heavy weight watercolor paper, I built up a very shallow relief by cutting shapes with a hobby knife and gluing the shapes down with gel medium. I then coated the whole thing with gel medium to create a consistent surface.


Trying to work with acrylic paint in a similar way as I do with watercolor pencil, I then used cadmium yellow, yellow ochre, and burnt sienna to accentuate and highlight certain areas as well as to begin laying in the bigger patterns of dark and light. I blended the paint out with matte medium to create very transparent areas.


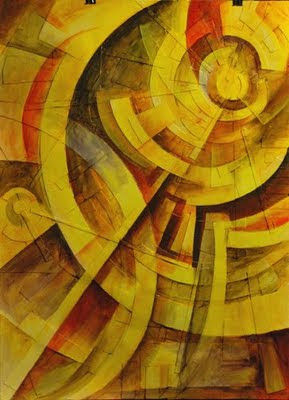
Using burnt umber, crimson, and pthalo blue, I added more glazes of paint to bring in more contrast and to further develop the pattern of light and dark. I then used titanium white mixed with other colors to bring some highlights to certain areas, and used all the other colors to develop the forms within certain areas by mixing and blending.


I've worked on it more since this last photo was taken, but the process has slowed down as I am beginning to tighten up and develop areas. I'll keep posting progress photos.

Monday, July 13, 2009

Journal Pages and News

I wanted to share this journal spread from my current journal. I began it back in December. It's all about the impact that we have on other beings. I wanted to do something a little different, so I kept it all black, white, and grey. I began by writing about the word "gravity" using water-soluble graphite. I spread water over the page, and allowed it to dry. I then built up layers of more water-soluble graphite, ink, silver paint marker, and collage. I don't know if it's finished, but I wanted to share.

Now, the news - the manuscript for our book is done, and has been sent off to the publisher. But not before a big scare. My computer crashed as I was finishing the final edits. I was just about finished, when my laptop froze. No big deal - a forced shut down would clear it up. But when I tried to turn it on - all I got was a flashing question mark. Hours and hours of trying everything and still nothing. Turned out to be a failed hard-drive. Luckily, in one of my all-too-rare moments of brilliance, I had all the book documents on an external hard drive. I only lost a few changes, and was able to finish up the edits the next day on the desktop. Other than losing all my data including photos and my iTunes library on the computer hard drive, it wasn't anything valuable. All the really valuable stuff is on the external hard drive and my two flash drives.

So, we have a title, a cover (the publisher has finalized a cover, and I'll share that as soon as I can), and a manuscript. I'll post updates regularly.

Wednesday, July 1, 2009

Connection

I seem to focus a lot on the idea of connection with other human beings, but there is one particular connection that means more to me than anything. Unfortunately, I at times take it for granted, and it hasn't been something that I have explored much - well at least here in blogger-land, but also in my journal. Perhaps it is a privacy issue. But whatever the issue is, I feel that it is important to acknowledge - at least in a small way - the importance of that connection.

And that connection is with my wife. This past weekend we celebrated our wedding anniversary with a simple lunch and some book shopping, and I've been thinking a lot lately about her, our years together, and what she truly means to me. Without her, all of the wonderful things that have happened over the last few years would have been pretty meaningless, and I could have done none of it without her support. She has been there with me every step of the way and has always been my biggest champion even when it has meant my flying off to another conference or spending days and days away conducting workshops or working on the book.

The Journal Fodder Junkies could not be possible without her. So, this is just a little acknowledgment - a little thank you for the woman who has been there for me. I thank my wife Joanne for her patience, understanding, and love.

Tuesday, June 23, 2009

Collaborative Journal

Yesterday I found a package from North Carolina waiting in my mailbox when I got home. I knew exactly what it was. I immediately tore it open, and savored all the new things added by Erin. I am continually blown away when I see what she has done. The above spread is absolutely beautiful with Erin's lace-like brush work in white. The lizards and bugs are nice visual surprises.

This Tangled spread began near the start of the collaboration when Erin drew a few of the branch forms in ball point pen. I continued the ball point pen drawing and added red circles. It was a beautiful page after that, but with Erin's addition of the purple, yellow, red, and text, it has to be one of my all-time favorite pages.

I posted this spread back in January, and since then, it has undergone a tremendous evolution. With the addition of the translucent envelope, I had to scan it twice to get both pages of the spread.


I am still mystified at how well our two styles have melded together to create this amazing work, especially thinking how Erin and I were complete strangers at the beginning of December. As always I am grateful for the shared journey and friendship.


Wednesday, June 17, 2009

The New and The News

Time slips by so quickly and so silently, and I keep meaning to do the one hundred things on my to-do list, but they fall between the cracks. But I found some time this morning to scan some pages from my current journal, and I'll post some more throughout the next week or so.

The New: So this is a new scan of Page 1 in Volume 12 of my journals. I began this page back in November, and I have slowly added to it. I began this page with watercolor and then drew the self-portrait from a photo that I took, and I've added watercolor pencil and ink. It is by no means finished, but I don't know if I'll go back to it much. I haven't worked much in my journal lately. I've been busy with so many things as well as just being plain worn out and exhausted. Perhaps with the school year wrapping up, I'll have more time soon.

The News: As mentioned, another school year is quickly coming to an end, and I am finishing my 13th year as a public school art teacher. I'm already looking forward to next year thinking about all the things that I'll do better and differently.

Our book finally has a title. Actually we have known about it for some time, but I just keep forgetting to post about it. But our book will be titled, The Journal Junkies Workshop: Visual Ammunition for the Art Addict, and will be released by North Light Books next year. We've actually have seen a design for the cover, and I'll share the finalized cover when I can. We are very excited about it.

And finally, Dave finished up his MFA in May, and has landed a teaching gig at Appalachian State University in Boone, NC where he will be teaching both Art Education and Studio Art courses. Congrats Dave.

Sunday, May 24, 2009

IF - Cracked

For the past Illustration Friday topic "cracked" I decided to create a graphite drawing. Drawing was my first love in art, and I spent hours drawing growing up - especially portraits. I feel like I have pretty good facility with pencil and shading. I still love watching a piece come "alive" - even if it's not an animate subject. When faced with a blank piece of paper and a pencil, I feel like I am carving into the surface, not drawing on top of it.

Although, I do not draw as much as I once did, and portraits really are rare in my art, I find myself returning to graphite now and then. I have turned away from portraits in favor of these abstract, shallow-spaced pieces. They have been much influenced by my mixed-media, layering work I have done in the journal.

These pieces rarely contain representational imagery, but can hardly be called non-objective. They really are representations of identity and experience. The way we experience a moment or an event is such a complex mental, physical, and emotional amalgam. Our experiences and our identities are such rich, multi-level entities that I have focused on this idea in much of my recent artwork. This particular piece explores how such a complex structure can be so very fragile and prone to cracking. So for all it's balance, rigidity, and structure, this piece is on the verge of complete disintegration as the cracks begin to show.

Monday, May 18, 2009

Journal Page

I just wanted to post a page from my current journal. I haven't had much to scan and post in the current journal that wasn't done specifically for Illustration Friday since much of it is still in process. But this page felt like it needed posting. It was begun shortly after NCCAT in December and is all about my desire to connect with others.

Monday, May 11, 2009

IF - Parade

Last Friday's Illustration Friday topic "parade" sparked this two-page spread in my large Moleskine sketchbook. I recently took a trip down memory lane as a looked through some old sketchbooks. These little 5.5x8.5 inch books were mostly from a time before I discovered the visual journal, and they were little books that I always carried around with me doodling constantly and writing the angst and love riddled poetry that only a twenty-something can write. They were truly my first visual journals, and the last two were my first foray into the world of visual journaling as I know it now.

But last week, I began flipping through them in an attempt to find some inspiration. I was immediately floored by their raw and prolific nature. I used primarily black ink and I sketched and worked fast, but I still manged to fill two or three per year. I didn't read the poetry, but I looked at page after page of doodles, sketches, and visual jottings. I was amazed to see some things - shapes, forms, and images that still reoccur in my art, but I was equally impressed with things that no longer occur in my art namely the figures. I've always loved figures and faces and people in general in art, but I've gotten away from the quick gestures that populate these little books.

So I decided to revisit them in a parade across two pages. I started with the black ink figures and then added the red-violet swirl. I then added watercolor pencil and finally watered down gesso. Despite begin grouped together, these figures are isolated from each other and do not interact. The gesso creates a fog and only bits through the rectangles are clear. It has a sombre feel, and it is most likely not finished and will evolve into something more.

Monday, May 4, 2009

Layers: A Tutorial: Part 4 - The Last Layer

I finally finished this layered piece. For the sixteenth and final layer I used acrylic paint to solidify and enhance a few more areas with in the swirling forms. I also used crimson paint to re-emphasize some of the red vellum I put in much earlier and to paint some thin red lines. I also used white paint marker to write some not so evident words and to draw in the lines and rectangles. I used black paint marker to draw more lines and to sign the piece. I am quite pleased with how it turned out.

Now I just need to decide how if should be displayed. I was thinking about mounting it on wood and framing it some how, but who knows.

Saturday, May 2, 2009

Collaboration and Inspiration

I often find inspiration from my artist friends, and I couldn't resist using a recent post by Steve of Go Flying Turtle as a source of inspiration for the beginnings of a page. Steve recently posted about his splotches posting 100 different watercolor splotches on Flickr and calling for artists and bloggers to collaborate and use his splotches how they see fit. I decided to use the contour of the splotch below to create a line drawing for a new journal page. I actually cropped the original splotch in Photoshop allowing it to go off all four sides of the image. I then printed out the cropped image and drew the contour. I have no idea what this page will evolve into, but it's a start.

Tuesday, April 28, 2009

IF - Theater

For last Friday's Illustration Friday prompt "theater", I automatically thought of masks and roles. This page in my current journal actually began as planning (the writing and face sketches under all the other layers) for a project for one of my classes, but fit in perfectly into the topic.

The page plays off of something I remember from my sociology class in college - the dramaturgical perspective where behavior of an individual is analyzed as if it were a theatrical performance. The basic notion is that life is a stage and we are the players (wait that sounds familiar). But we have our role and our character that we play for the audience (society) when we are onstage, but we can step out of character - be our true selves when there is no audience (backstage). I've always liked this perspective and it fits well with my recent readings by Carl Jung and idea of the persona being the "mask" we present to people.

So this page explores these notions and how the characters and roles we play are the masks that we wear and present to people. We may play different roles to different people and may wear different masks, but what about the actor behind the role - behind the mask. Who ever really sees the true identity of another individual, and why are we so willing to lock ourselves and others up in the roles they play? These questions came to me as I worked, and I wondered why we fear revealing ourselves, why we hide, and what happens when we become trapped within the roles. How many of us have felt like phonies at sometime or another? How often do we fall into the roles either we create for ourselves or are created by others?

These are all thoughts that have been going through my mind lately. The page is far from being finished, but I wanted to share.

Monday, April 20, 2009

Layers: A Tutorial - Part 3

The changes in these three layers are not as pronounced as when I first started, but nearing completion, this piece has become very rich, very layered, and very complex with a lot of push and pull.

13. To bring back the word "sift" and the numbers that I stenciled in earlier in the process, I used water-soluble graphite pencil to shade in around the letters and the numbers. This darkened the negative spaces and allowed the letters and numbers to "pop". Instead of using water to blend the graphite, I used matte medium. The acrylic medium mixes with the water-soluble graphite and creates an interesting glazed effect. To strengthen and accentuate the letters and numbers even more, I use white colored pencil to fill them in. The white is somewhat opaque bringing a bit of solidity to the word and numbers. I then painted a layer of the matte medium over the entire surface. This does two things. It seems to make the colors a bit more saturated and it prepares the whole surface for acrylic paint by covering everything with a consistent layer.

14. I wanted other images in the piece so I used four packaging tape transfers. This simple technique worked on bits of maps from an old road atlas lying around the studio as well as a laser print of a tree image (which is by photographer Eugene Atget). With these types of image transfers, the image is stuck to the clear tape and the paper is removed to create a transparent image. I used glue stick to glue the images to the surface. I probably should have used acrylic medium. But I sealed the entire surface with more matte medium which took the glossy finish off the tape transfers.


15. I spent quite a while applying acrylic paint to the piece as a way to accentuate some of the lines and forms. The layers of matte medium provided a good surface on which to paint, and I carefully mixed, blended, and layered paint in a way to bring a lot of contrast to the upper right and to several other areas throughout the composition. I used an acrylic retarder to allow for more mixing and blending directly on the surface. After the acrylic thoroughly dried, I used an opaque paint marker to apply black lines. For the most part these lines reinforced lines that were put in previously.

So this piece is close to being finished. I'll probably apply more paint as a way to solidify a few more areas and to push the paint marker into the piece instead of allowing it to float on the surface.

I am quite pleased with this piece, and although I was more particular and meticulous with this piece than I would have been with a journal page, hopefully you can see how I layer and layer to get those rich pages. I'll post the finished image once it is completed.

Wednesday, April 15, 2009

Layers: A Tutorial - Part 2

The piece is slowly developing as I layer more and more into it. Here are the next four layers using Prismacolor watercolor pencil, collage, uni-ball Vision Needle pen, and Prismacolor colored pencil.

9. For this layer, I used Dark Umber watercolor pencil to enhance many elements with in the piece and bring more contrast to the forms. I darkened around the three rectangles as well as bringing more definition to the spiraling forms. As a result the rectangles begin to "pop" more and there is a greater sense of shallow space.


10. Next I collaged in three different types of paper. First I cut and glued down the red flowered paper which is the wrapper from a bar of rose-scented Flower & Bee soap. I then tore some translucent white paper and glued it in three of the corners, and I cut a rectangular piece of the same paper and glued it over the rectangle in the lower left. Finally I cut and glued down pieces of red vellum. The transparency of the vellum is a great layer allowing previous layers to show through.


11. I then added more rectilinear elements with black waterproof ink. I used a template (stencil) to draw the repeating squares throughout. I added some larger rectangles as well with the pen. I tend not to use a ruler and prefer, instead, to free-hand it. I also used ink to define the facial features as well since the face did not transfer well in Layer 8. The repeating rectangles, squares, and colors bring a structure to the piece that keeps it balanced and unified.


12. Using a variety of colored pencil, mostly shades of brown, I enhanced and accentuated many of the forms. With careful shading and blending, I was able to create some shallow depth especially around the spiral and the rectangle in the upper left.

This piece is coming along nicely. I do feel that I've gotten a bit tight and fickle with it, but I usually do with smaller pieces. I still plan on layering acrylic and other image transfers into this piece, as well as re-emphasizing the word "sift" that has now become lost in the lower right corner.

Monday, April 13, 2009

Layers: A Tutorial - Part 1

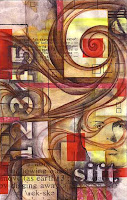
A common question that I get asked is "How do you create the layers on your pages?" I thought that I would take the opportunity to share how I slowly build up layers in my journal. Now not every page is built up in this way and this slowly, but for those rich, pages with depth and transparency, the process is gradual. With this post, I'll share the first eight layers, and I'll share subsequent layers in future posts.

For this piece (which incidentally is not in my journal, but a small experiment using a different kind of drawing paper - but the result is the same), I used Prismacolor watercolor pencil, Winsor and Newton watercolor, graphite, and solvent transfers. I am including the specific names of the colors in case some are wondering, but I am in no way saying that this is the only way to create layers. This is simply a look at a particular process of mine to give people an idea of how I do it. I strongly encourage people to experiment with the process, the colors, and the media.
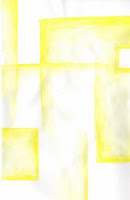
1. I usually try to start with the lightest color, but not always. With this piece, I began with some random rectilinear elements using Canary Yellow watercolor pencil by pressing firmly and shading a lot of pigment. As I applied water, I was very conscious about not simply spreading water all over the paper. I paid very particular attention to the hard edges, and by applying more water, I allowed the pigment to fade into the white of the paper where I did not want hard edges. I allowed this to dry completely before adding the next layer. I find it helpful to have several pieces or pages going at one time so I can rotate among the pieces as things need to dry.
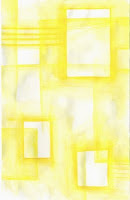

2. I completely ignored the first layer and then added three rectangles and the two set of strips using Spanish Orange which is a slightly darker yellow-orange color. By ignoring the layer before, this layer begins to create a transparency effect. As I applied the pigment, I made certain to press firmly and to shade down a lot so the color would be rich and saturated. I applied the water so that rectangles would maintain their hard edges. As with the first layer, I allowed this layer to dry completely before I moved on.
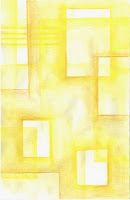


3. Using Goldenrod watercolor pencil, I added the next layer by again ignoring the layers underneath and continuing with the rectilinear elements. This build up of vertical and horizontal lines and rectangles begins to create an informal grid providing the underlying structure of the work. I allowed this layer to dry completely before adding the next.
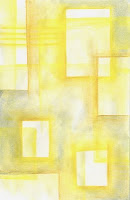


4. Using blue watercolor (I believe it was a Prussian Blue), I accentuated and enhanced some of the rectilinear elements. This also added some contrast as the cool blue plays against the warm yellows. By alternating the ignoring and enhancing of the previous layers, I can begin to create transparency and a shallow sense of depth as the layers begin to build. I find that I do this consistently throughout the process.
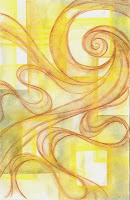


5. I next added some contrasting linear elements using Terra Cotta watercolor pencil. The rectilinear elements provide the structure, but the curving, spiraling forms will create a dynamic composition full of contrast. I ignored the underlying layers as I applied the pigment, and I was careful when I applied the water so the pigment did not spread all over the piece. As with the other layers, this one was allowed to dry completely.
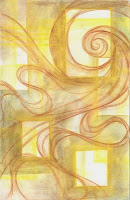


6. As not to lose the rectangles, I placed in layer 3, I used Burnt Umber watercolor paint to darken the space around them. I also darkened corners. The first layers of the watercolor pencil often resist the layers of watercolor paint due to their waxy nature and often create unexpected textures and effects. I allowed the layer to dry completely.
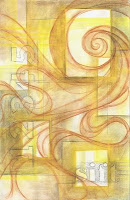


7. Taking a break from the wet media, I switched to graphite for this layer. I stenciled the word "sift" at the bottom and the numbers along the left side. I also added some shading around some of the rectangles to enhance and accentuate them, and I added some grid lines to create more structure. I find using a particular medium throughout the piece allows things to stay very balanced and unified as it shows consideration for the entire piece. And that way the entire piece gets built up at the same pace.
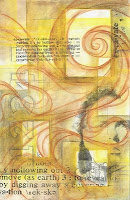


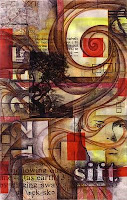
8. I've been thinking a lot lately about how my work is an excavation of sorts - how even though it is layered, it is more like digging into the surface, not building on top of it. So as a way to explore this concept, I scanned and laser-printed the definition to the word "excavate" from a dictionary, and I printed a black and white self-portrait photo as well. Since a laser printer uses a toner-based process, I was able to transfer the the images using a solvent called xylene - found in the graffiti remover, Goof-Off. I made a couple different sizes of the definition image and made certain to flip the images so that the words would be correctly oriented once transferred. Using the Goof-Off in a well-ventilated area, I transferred the toner based images to the piece. The self-portrait did not transfer as clearly as I would have liked, and it covered up much of the word "sift". But that is part of the process, and I'll have to figure out how to enhance the portrait and the word as I work with subsequent layers.

So, this piece is far from being finished even after 8 layers. I plan on using more layers of watercolor pencil, and I also plan on using ink, collage, and acrylic paint. But at this point I'm not certain where this piece will go. I'll just make certain to keep scanning every layer. Who knows, I may end up with 20 or 30 layers by the time that I am done. It's all part of the excavaiton. I never know what I'll discover as I dig.