For this piece (which incidentally is not in my journal, but a small experiment using a different kind of drawing paper - but the result is the same), I used Prismacolor watercolor pencil, Winsor and Newton watercolor, graphite, and solvent transfers. I am including the specific names of the colors in case some are wondering, but I am in no way saying that this is the only way to create layers. This is simply a look at a particular process of mine to give people an idea of how I do it. I strongly encourage people to experiment with the process, the colors, and the media.
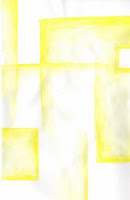 1. I usually try to start with the lightest color, but not always. With this piece, I began with some random rectilinear elements using Canary Yellow watercolor pencil by pressing firmly and shading a lot of pigment. As I applied water, I was very conscious about not simply spreading water all over the paper. I paid very particular attention to the hard edges, and by applying more water, I allowed the pigment to fade into the white of the paper where I did not want hard edges. I allowed this to dry completely before adding the next layer. I find it helpful to have several pieces or pages going at one time so I can rotate among the pieces as things need to dry.
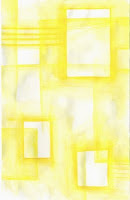 2. I completely ignored the first layer and then added three rectangles and the two set of strips using Spanish Orange which is a slightly darker yellow-orange color. By ignoring the layer before, this layer begins to create a transparency effect. As I applied the pigment, I made certain to press firmly and to shade down a lot so the color would be rich and saturated. I applied the water so that rectangles would maintain their hard edges. As with the first layer, I allowed this layer to dry completely before I moved on.
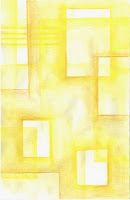 3. Using Goldenrod watercolor pencil, I added the next layer by again ignoring the layers underneath and continuing with the rectilinear elements. This build up of vertical and horizontal lines and rectangles begins to create an informal grid providing the underlying structure of the work. I allowed this layer to dry completely before adding the next.
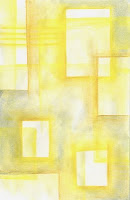 4. Using blue watercolor (I believe it was a Prussian Blue), I accentuated and enhanced some of the rectilinear elements. This also added some contrast as the cool blue plays against the warm yellows. By alternating the ignoring and enhancing of the previous layers, I can begin to create transparency and a shallow sense of depth as the layers begin to build. I find that I do this consistently throughout the process.
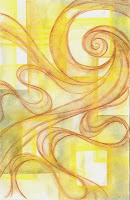 5. I next added some contrasting linear elements using Terra Cotta watercolor pencil. The rectilinear elements provide the structure, but the curving, spiraling forms will create a dynamic composition full of contrast. I ignored the underlying layers as I applied the pigment, and I was careful when I applied the water so the pigment did not spread all over the piece. As with the other layers, this one was allowed to dry completely.
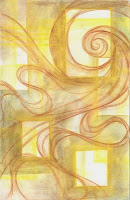 6. As not to lose the rectangles, I placed in layer 3, I used Burnt Umber watercolor paint to darken the space around them. I also darkened corners. The first layers of the watercolor pencil often resist the layers of watercolor paint due to their waxy nature and often create unexpected textures and effects. I allowed the layer to dry completely.
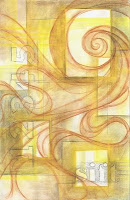 7. Taking a break from the wet media, I switched to graphite for this layer. I stenciled the word "sift" at the bottom and the numbers along the left side. I also added some shading around some of the rectangles to enhance and accentuate them, and I added some grid lines to create more structure. I find using a particular medium throughout the piece allows things to stay very balanced and unified as it shows consideration for the entire piece. And that way the entire piece gets built up at the same pace.
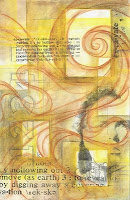 8. I've been thinking a lot lately about how my work is an excavation of sorts - how even though it is layered, it is more like digging into the surface, not building on top of it. So as a way to explore this concept, I scanned and laser-printed the definition to the word "excavate" from a dictionary, and I printed a black and white self-portrait photo as well. Since a laser printer uses a toner-based process, I was able to transfer the the images using a solvent called xylene - found in the graffiti remover, Goof-Off. I made a couple different sizes of the definition image and made certain to flip the images so that the words would be correctly oriented once transferred. Using the Goof-Off in a well-ventilated area, I transferred the toner based images to the piece. The self-portrait did not transfer as clearly as I would have liked, and it covered up much of the word "sift". But that is part of the process, and I'll have to figure out how to enhance the portrait and the word as I work with subsequent layers.
So, this piece is far from being finished even after 8 layers. I plan on using more layers of watercolor pencil, and I also plan on using ink, collage, and acrylic paint. But at this point I'm not certain where this piece will go. I'll just make certain to keep scanning every layer. Who knows, I may end up with 20 or 30 layers by the time that I am done. It's all part of the excavaiton. I never know what I'll discover as I dig.

No comments:
Post a Comment